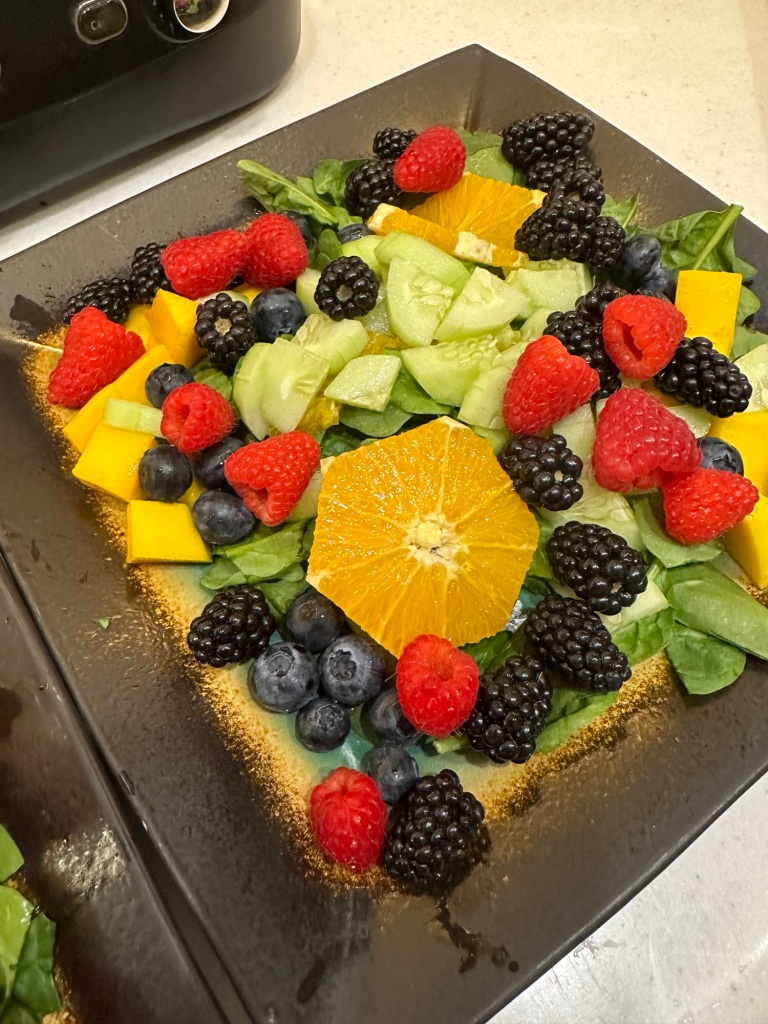
This is a great salad to have as the weather is getting warmer and you don’t want to really cook. It’s loaded with vitamins and it’s beautiful too! Just look at that color! *chef’s kiss 💋
What you need: this serves two.
1 — large handful of spinach for each plate, chop with scissors while plated.
1— honey mango, divided between two plates
1— orange, divided between the two plates
1 pint— blueberries, halved between plates
1 pint — raspberries, halved between plates
1 pint — blackberries, washed and divided between plates
1 — medium cucumber, peeled and only use half of a half. Half that half between two plates. 🤭
Poppyseed dressing or any homemade dressing you like. However much you want.
Say, “Wow! This tastes like sunshine on a plate! And I feel greeeat!”
Directions:
Wash all your fruit and spinach
Peel, chop, cut
Plate to be pretty
Top with dressing
Chow down.
Filling and delicious.
Enjoy!
Happy Spring! 🐰
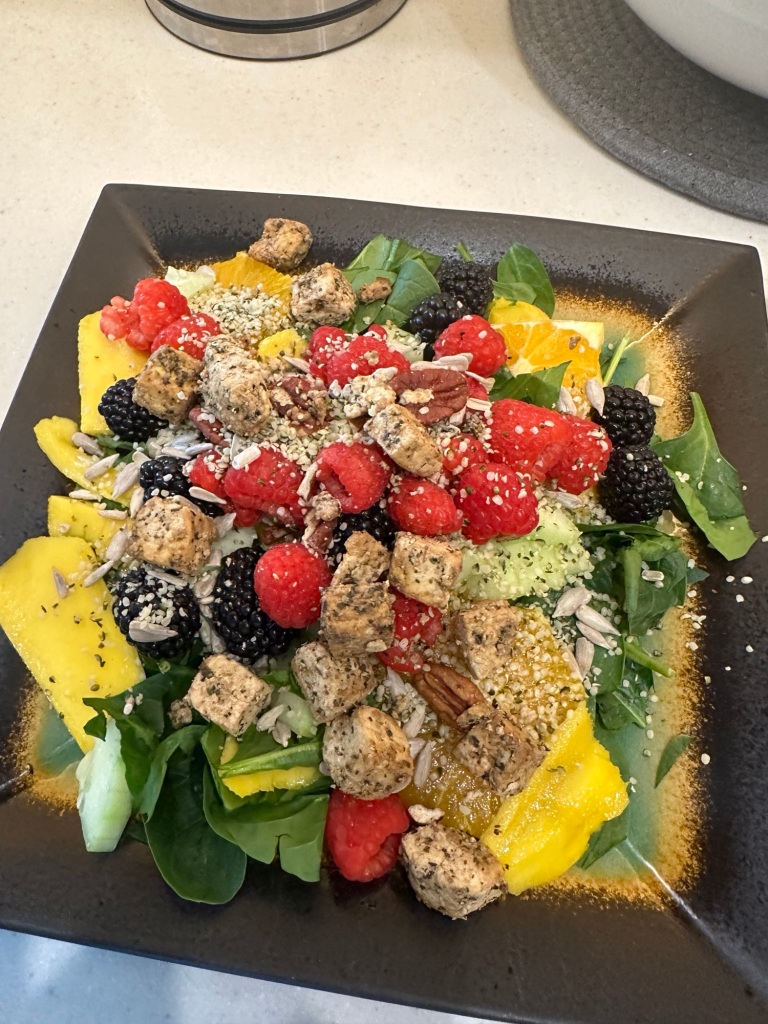
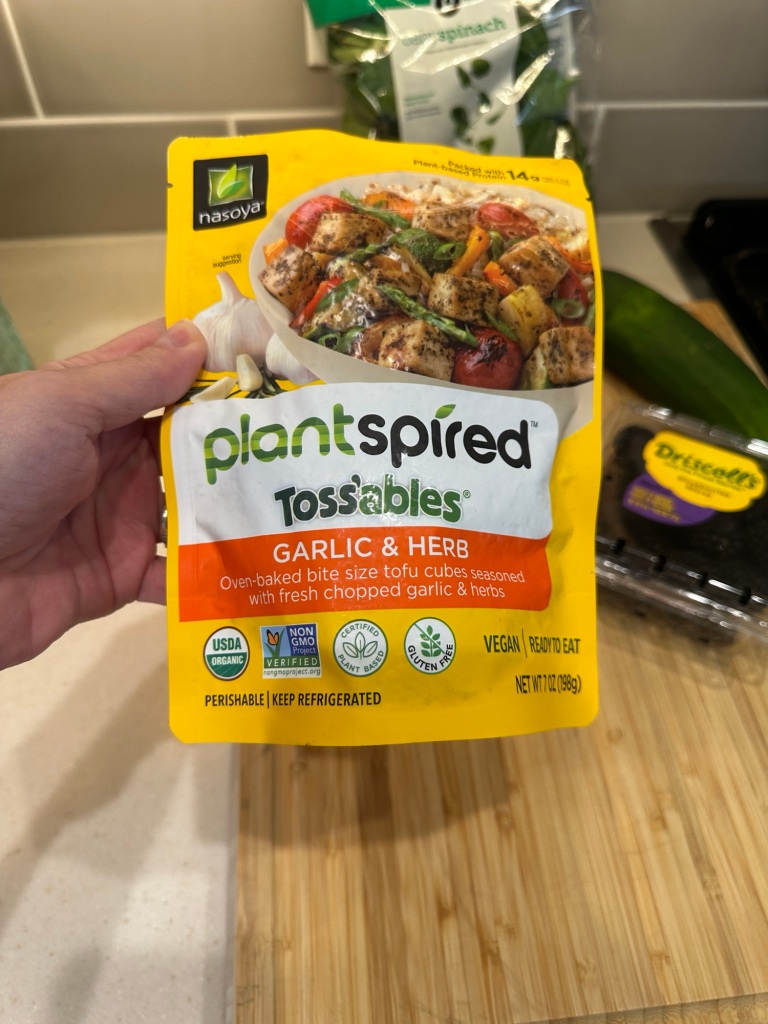
Note: I also add tofu and various seeds and nuts sometimes. You do you, boo.
With pecans, sunflower and hemp seeds.Love this stuff!
We signed up for Hungryroot grocery service recently and although only one meal left a lot to be desired and there a few hiccups in the second weeks menu even after altering the items we wanted, we have decided to continue on with a third week to see how it goes.
Week one: we ordered 5 dinners and some light snacks (not shown.)
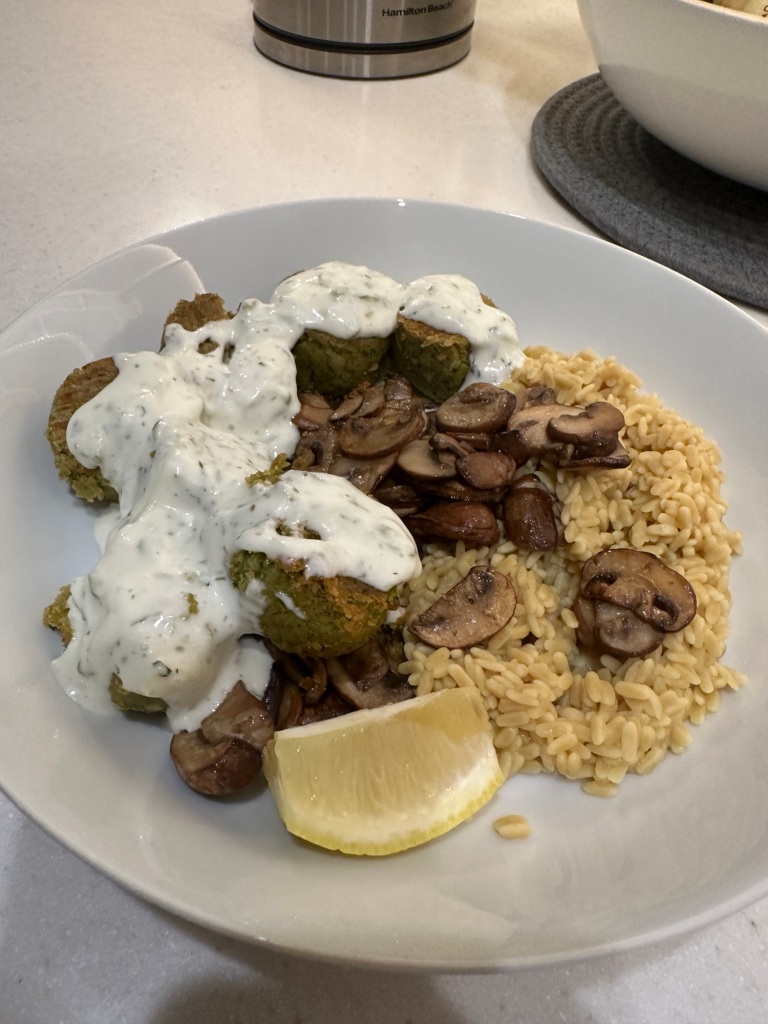
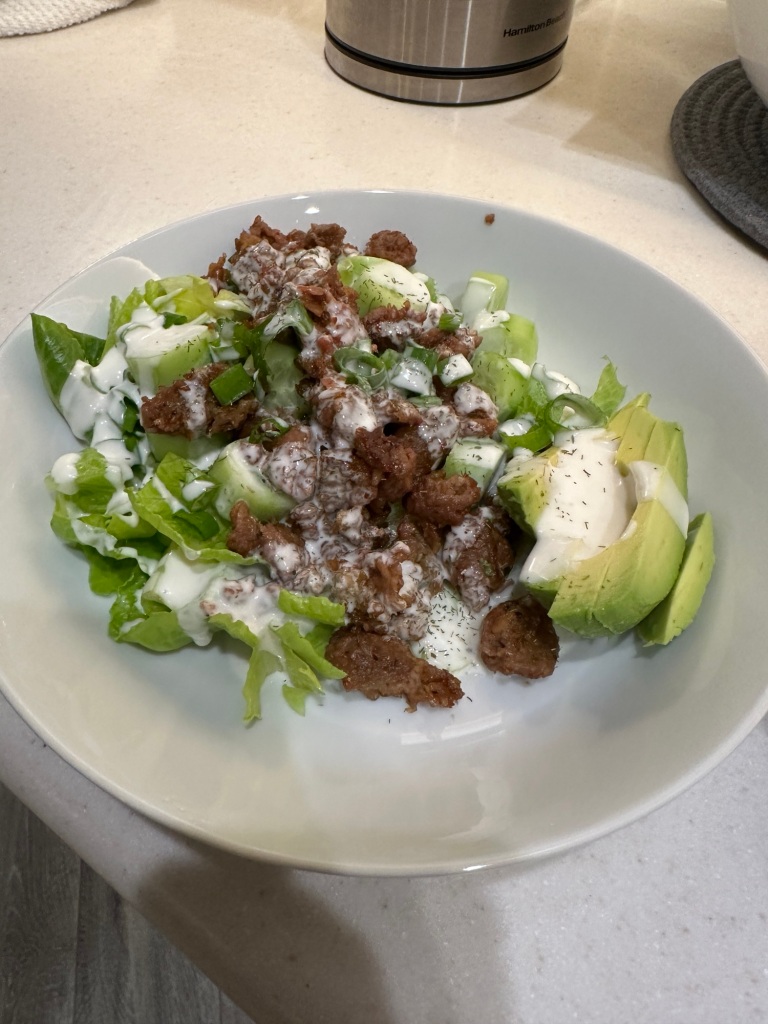
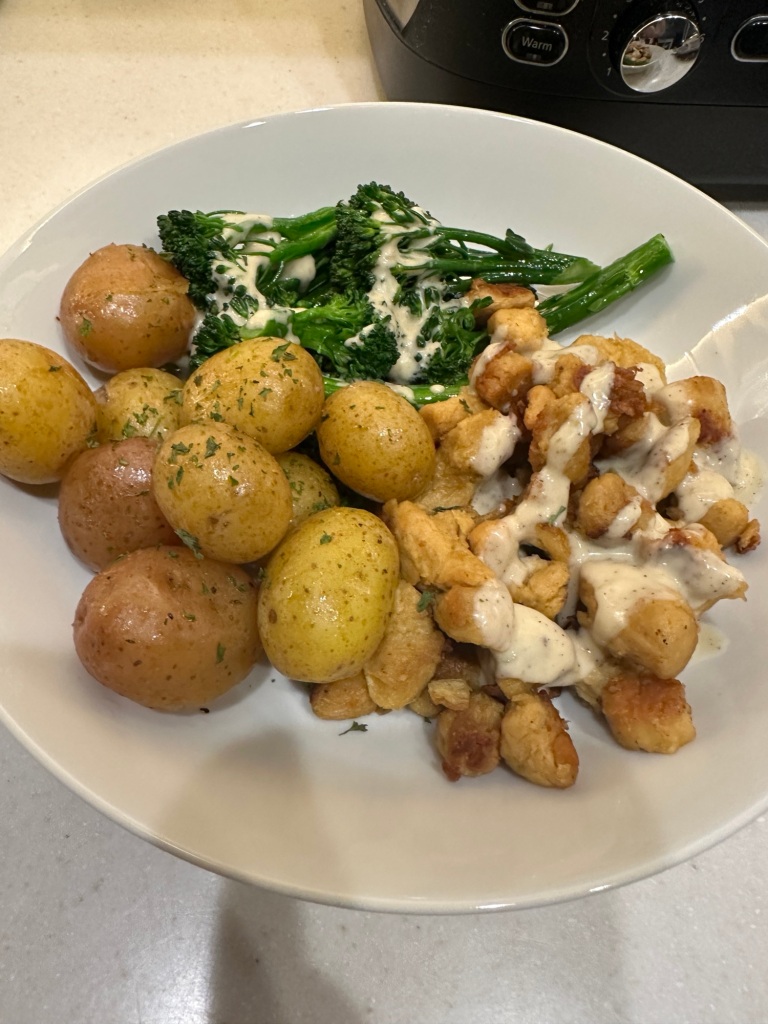
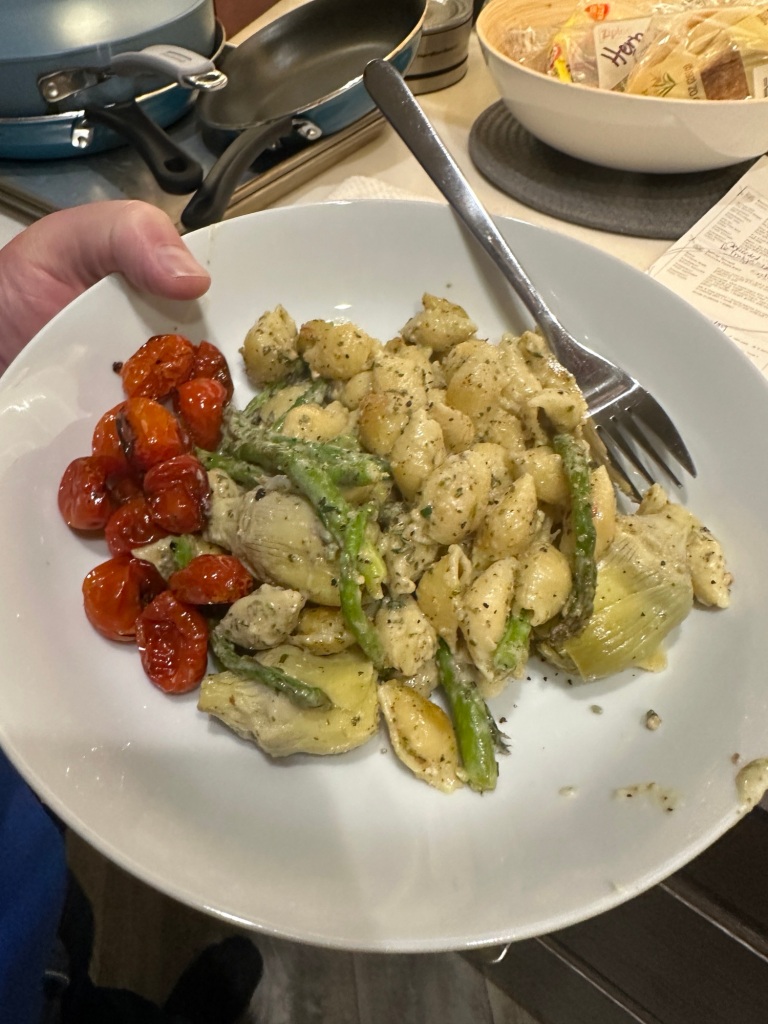
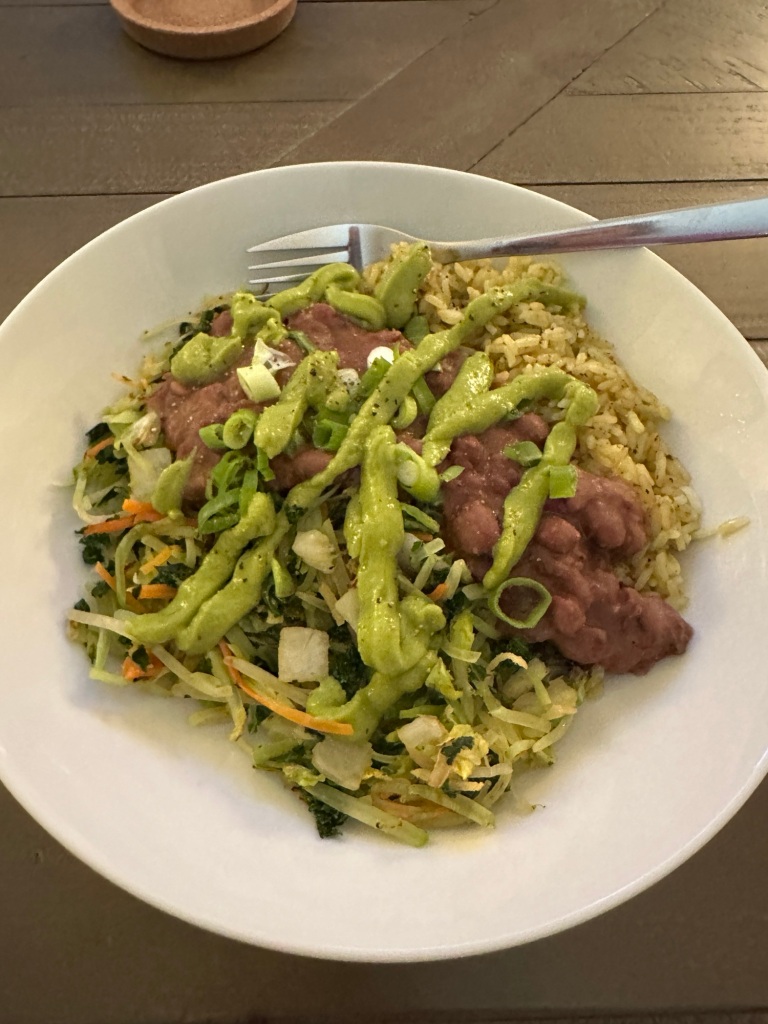
Zucchini Mushroom Falafel Bowl- good, but I had to add the rice.Beyond Taco Salad with Creamy Lime Dressing- just ok. I like hot meals, or cool meals. Not hot meat with cold salad. Caesar Chick’n Baby Broccoli and Herbed Potatoes- really goodSpringy Spinach and Artichoke Pasta Bake – I added a jar of artichoke hearts I already had. – super good!Refried Red Beans n Guacamole Bowl -not good at all. This called for frying salad blend. 🤮
The taco salad should have had taco chips sent with it to truly be a taco bowl. And the Zucchini Mushroom Bowl needed rice with it, but I had a pack of Right Rice and added that. I said no zucchini and they still sent zucchini falafel, luckily it wasn’t bad. The other two days we ate something my husband cooked or had take out.
Week two: We updated our meal choices and cancelled all snacks. They were highly processed and we didn’t really care for them. And also cancelled the cookie dough which we didn’t like and decided on free sweet potato burgers this week instead.
On the menu this week is:
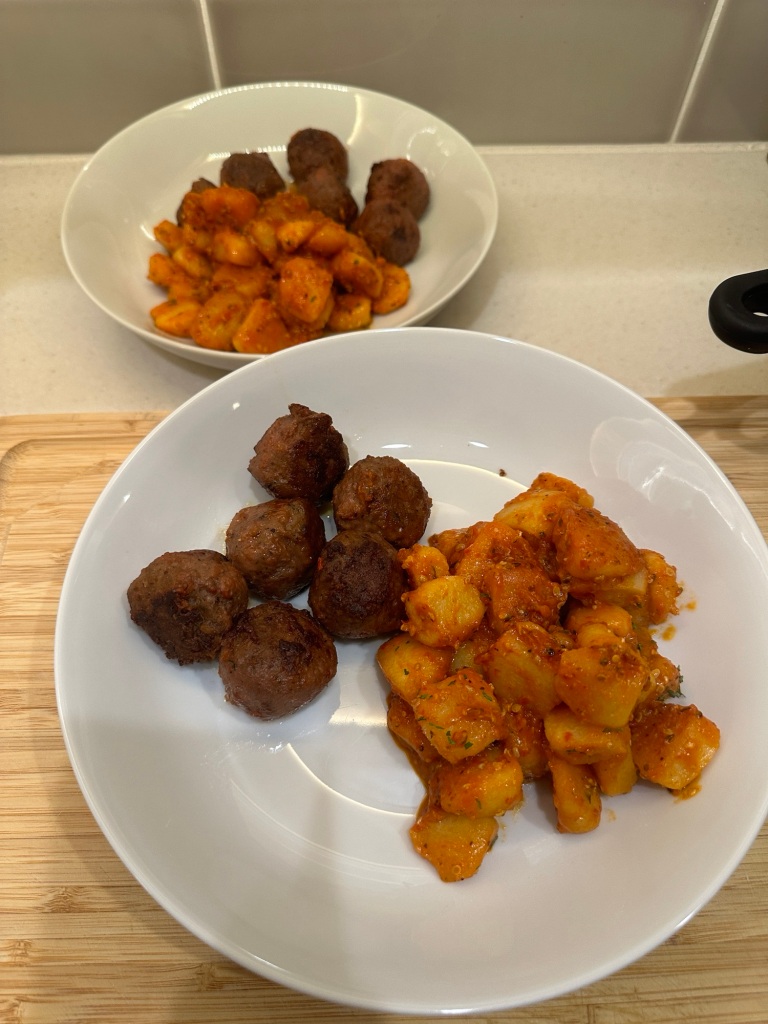
Red Sauce and Beyond Meatball with Cauliflower Gnocchi – really good!
For week two we have:
Chorizo Spinach Artichoke Gluten-free pasta
Spinach Artichoke Chorizo chickpea pasta, almost the same meal as above. Very disappointing.
Beyond Sausage Red Sauce Rotini, more pasta.
Beyond Zesty Vegan Tostada, more Beyond products
Black bean Taco in a bowl, again, no taco chips?
As you can see here: There’s two almost identical meals right off the bat. There’s way too much pasta and way too much Beyond meat options in one week. We have again updated our food choices to see what the third week will bring.
Pros of the food service:
Hungry root seems to be the only one that fits our dietary restrictions: gluten free, dairy-free.
It’s nice to have someone else come up with the menu so I don’t have to.
Less running to the store, saves you time.
Less waste, as serving size is for two and two is all you get.
You’ll lose weight if you are used to small portions. We are not.
Cost is comparable to the grocery stores, if you can find all the items.
Good selection of vegan items.
Cons of the food service:
Not a lot of thought goes into their bowl meals and we feel they are always lacking something: chips, sauce, rice, green onions, etc. I think bowl meals should include more than two items.
They don’t look back to the week prior to see what has already been eaten.
Food delivery times vary greatly, very early to late afternoon.
No extra portions
You tend to eat later in the evening because smaller dinners for us means we are hungry later on.
You’ll still need things on hand such as chips, sauces, rices, green onions, etc.
#hungryroot
I’ll keep you posted on whether or not we keep doing this and share more photos of the meals I make with their ingredients.
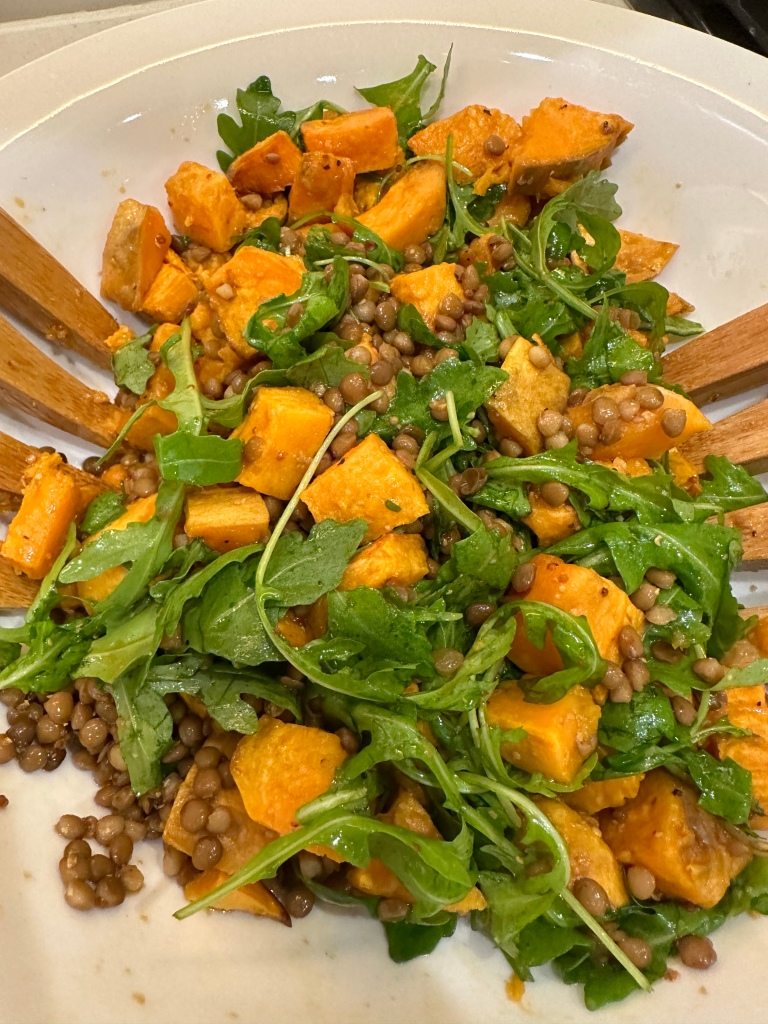
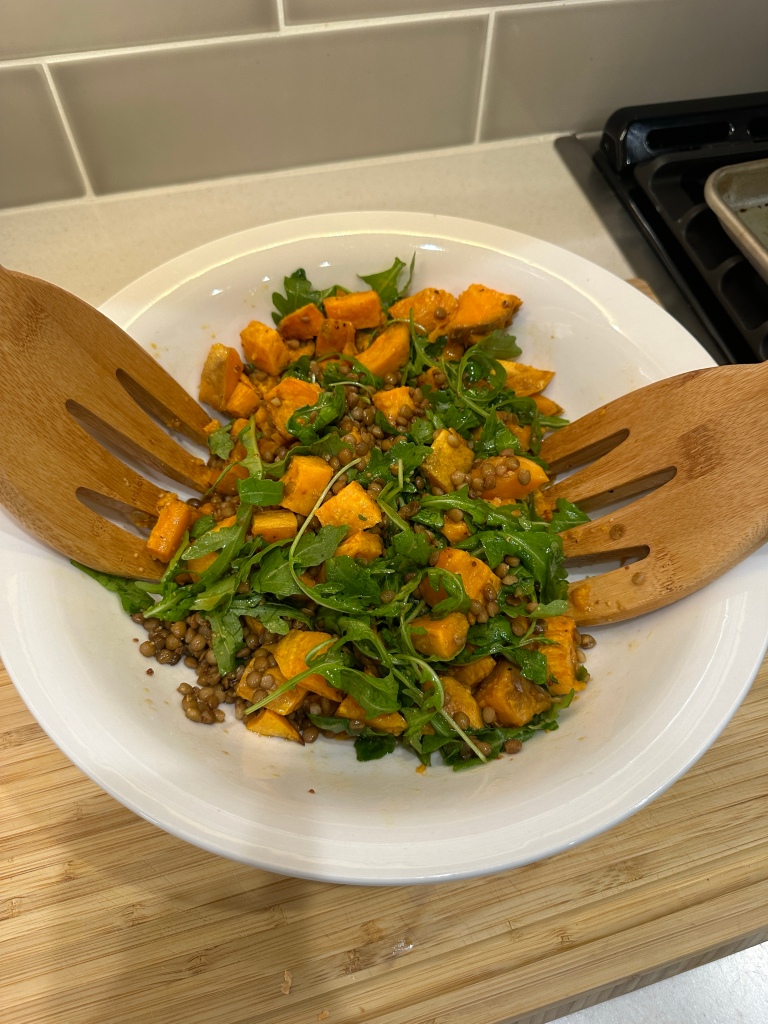
Hey there! Just wanted to stop by with the sweet potato salad I made for dinner today. It’s from The Buddhist Chef and it’s so good, good for you, and is super easy to make! I think you’ll like it as much as we did.
Ingredients:
2- small sweet potatoes or one very large sweet potato
1 can -lentils, drained and rinsed in warm water
3 cups – arugula
2 – Tbsp. Olive oil
Dressing:
2 Tbsp. – olive oil
2 Tbsp. – soy sauce
1 Tbsp. – maple syrup
1 Tbsp. – apple cider vinegar
1 Tbsp. – whole grain mustard
Salt
Directions:
Preheat oven 400 degrees
Peel, wash and dice potatoes into bite sized pieces and toss with olive oil and sea salt to taste
Bake for 35-40 minutes until fork tender
Drain lentils and rinse in a strainer with warm water. Set aside. (We are not cooking these or warming them on the stove.)
Add 3 cups arugula to a bowl. Add the lentils.
Make your dressing. Set aside.
When potatoes are done, add them to the bowl
Add the dressing and toss. The arugula will wilt as you toss this
Note: we added a handful of dried cranberries to each serving and will be eating it this way for Christmas. Eat solo or add turkey or chicken as a side. This would also be good with pumpkin seeds in it is too. Enjoy!
Hiya! I’m back again, but this time instead of a recipe, I wanted to let you know my first children’s book has just been published! You can find the Kindle e-book and paperback book here: https://a.co/d/cMlP5j1
I think the paperback would be more fun for children ages 3-7 because it’s an interactive book with a matching game and word search in the back, but I wanted to offer it in both formats just in case adult readers are traveling with young children and don’t have the book handy.
Synopsis of the book:
When a lady discovers a family of squirrels living high up in her bun, she is pretty surprised! Her new friends are so rowdy and rambunctious that her once tidy house is now a frightful mess! Find out how this lady and her new squirrel friends get along in this rhyming story!
This book reminds adult readers of the importance of having fun and helps teach children ages 3-7 years old that cleaning up is nice, sharing with others is kind, and both can be fun!
In the back of the book, you’ll find twenty questions for adults to ask children that will help children remember the story and interact with the reader. There is also an activity-matching page and word search for added fun!
I am currently working on two more children’s books and have a list of fun ideas to write about (most of which come from my real life.)
The backstory of The Lady and Her Squirrel Friends:
I wrote this story one day after sitting on my lanai lounging around and reading. When I came inside the house I realized I had a very large spider sitting up in my bun on the top of my head!! I KNOW, RIGHT!? Later, I sat down to write about it as a funny story. So, I changed the spider to squirrels, made up the rest, and The Lady and Her Squirrel Friends were born. When I posted the original story to my FB page people said it would make a great children’s book.
I originally wrote this story on 3/27/21. But, when I tried to find an illustrator, I quickly found out just how expensive they are and put it aside. Earlier this year, I stumbled upon a class that taught Indie authors how to illustrate our own stories, so I did it myself for much less.
Anyway, The Lady and Her Squirrel Friends books also have a glossy cover for ease of cleaning from tiny hands that may be sticky or gooey.
Note: The paperback has a tan background and the Kindle version has a white background. KDP publishing didn’t recognize the white background as being within the allotted margins, so I had to make it a complimentary color it could see.
Okay! That’s it! Sorry, I don’t have a recipe for you, but… I did make the trending Tiktok tortilla sandwich with potato salad yesterday. (I’m not on Tiktok, it came up in my FB feeds though.) It had tomato slices, avocado mash, dairy-free cheddar, and bacon on it. We are having the pizza version of this same sandwich later tonight. Below is a picture of last night’s dinner:
I hope you read my book, leave a review, and make yourself a Tiktok sandwich. So good! Hey! Maybe you could eat this sandwich AS you’re reading my book?! – Boop! Bye!
This is a recipe my friend, Stan Cohen showed on his Facebook page a few days ago. When I asked for the recipe, he asked if I ate sausage. When I said, “No.” He replied, “Then, this recipe isn’t for you.”
SILLY WABBIT! When will meat-eaters realize… we have our magic ways! 😉
I told him I could make it without, and so here it is with VEGAN sausage… ready for me to make again and again. Which I definitely will! For being so simple, it was the tastiest thing we’ve had in a long time. I hope you like it as much as we did. And if you do eat sausage, feel free to make it with a regular spicy sausage of your choice. Enjoy!
Ingredients:
2 lbs — Italian sausage, with 1/3 of it being spicy. (Or, 2 pkgs. of Beyond Breakfast spicy vegan sausage; 12 patties.)
1 — red bell pepper, cleaned and diced
1 — small onion, chopped, or onion powder to taste
1 — small container of white or portobello mushrooms, cleaned and sliced
Lots of garlic, fresh, or powdered to taste
1 — can stewed tomatoes, chopped while in skillet
1 — head of broccoli, steamed, or boiled in with the noodles
3/4 — box of macaroni, or any shaped noodle you like
Directions:
Start to boil the water for the macaroni on high heat
Clean and dice all vegetables while waiting for water to come to a boil
Fry sausage, and add onions and garlic. If using frozen patties like I did, break apart as it cooks into a ground
Add the vegetables, (except for the broccoli), to the meat mixture and saute together until cooked through
Once sausage and vegetables are sauteed, add in the can of tomatoes and also break them into bite-sized pieces
Add your macaroni to the water and set the timer according to how you like your pasta cooked
When four minutes away from done, add your broccoli to the water and boil with the noodles
Drain the noodles and broccoli and then add into the skillet with your sausage and vegetables and stir
Note: We ate this for two days and it was delicious! Very simple, flavorful, and more than enough for two nights. You can also add or omit vegetables you don’t like, change or add in other spices, and make it your own. To reheat, microwave or add back to a skillet with a bit of water and heat over medium heat. Enjoy!
If you liked this post, you can buy me a cup of coffee here: https://ko-fi.com/robindonnelly Thanks so much for your support!
Hey, my little chickpeas! Sorry for not posting here for a while, but I’m having way too much fun over on Youtube! I can only do so much in a day, so creating art is what I choose more often than not.
Anyway, we are here, in Florida, hunkered down as we get high winds and rains from Hurricane Ian. It’s like a winter’s day here today, so I thought I’d share a recipe I made a few days ago. It’s from Nagi over at Recipe Tin Eats, but I made mine dairy free by making my own “ricotta” from almond meal. The dairy-free ricotta recipe is here.
Ingredients:
Puff pastry, two in a box. (I used Pepperidge Farms Puff Pastry.) You will use both sheets. ** These are not gluten-free but are dairy free. (Because my diet is so limited, I do eat gluten occasionally because I’m not allergic to it or a Celiac. I do however steer clear of dairy at all costs!)
For the filling:
1 – 8 ounce frozen spinach, dethawed and drained.
13 ounces — ricotta, regular or dairy free.
3/4 cup — grated parmesan
1 and 1/2 cups — any, (I used shredded cheddar cheese.)
1 egg, for the filling, only if you are using regular ricotta cheese, OMIT the egg if making dairy-free ricotta. You will need 1 egg mixed with water for a wash to brush onto the rolls prior to baking.
1 clove garlic, minced
Pinch of nutmeg
Salt and pepper to taste
For the topping of each roll:
1 egg, whisked with a tsp of water
Sesame seeds
Directions:
Remove the spinach and puff pastry from the freezer and allow it to thaw.
Once unthawed, drain the spinach in a colander and press out the remaining water by pressing it with a spoon.
Add the spinach to your ricotta, and add your cheeses, garlic, nutmeg, and salt and pepper. Mix well.
On a cutting board, roll out the thawed puff pastry and cut it into rectangle shapes.
Add to the lower bottom half of the pastry the ricotta mixture, and divide evenly between all four rectangles you will get.
Beat one egg with a bit of water, get a basting brush
Brush the top half of the puff pastry with egg wash
Roll the bottom of the puff pastry up to the other edge and seal
Place in the refrigerator for 15 minutes while you make the other two rolls
Repeat the steps above by first cutting into rectangles and filling, brushing with egg and rolling up. Also, place these in the frig for 15 minutes to firm up.
Once 15 minutes is up, remove from refrigerator and cut into even pieces. Each roll yields three rolls.
Baste each with the rest of the egg wash and sprinkle with sesame seeds.
Bake at 350 degrees on a greased baking sheet for 30 minutes.
Serve warm.
Yields: 12 rolls
*** We ate these for three days and warmed them up in the oven at 350 for 10 minutes and they were perfect. I served them with a side of edamame one day, noodle soup the next, and potatoes the next.
I hope you enjoy these as much as we did!
Rolled up and chilledCut up and basted with egg wash and sprinkled with sesame seeds
If there’s one thing I miss since being diagnosed with a cow’s milk allergy — it’s ricotta cheese. I found this recipe at Tastes Lovely dot com Sunday and I made a lasagna immediately thereafter. It was delicious!
With the leftover ricotta we had open-faced ricotta sandwiches drizzled with olive oil and salt and pepper the next day. Yummy! You can try them with Gazpacho on one of these triple digit days! Whew!
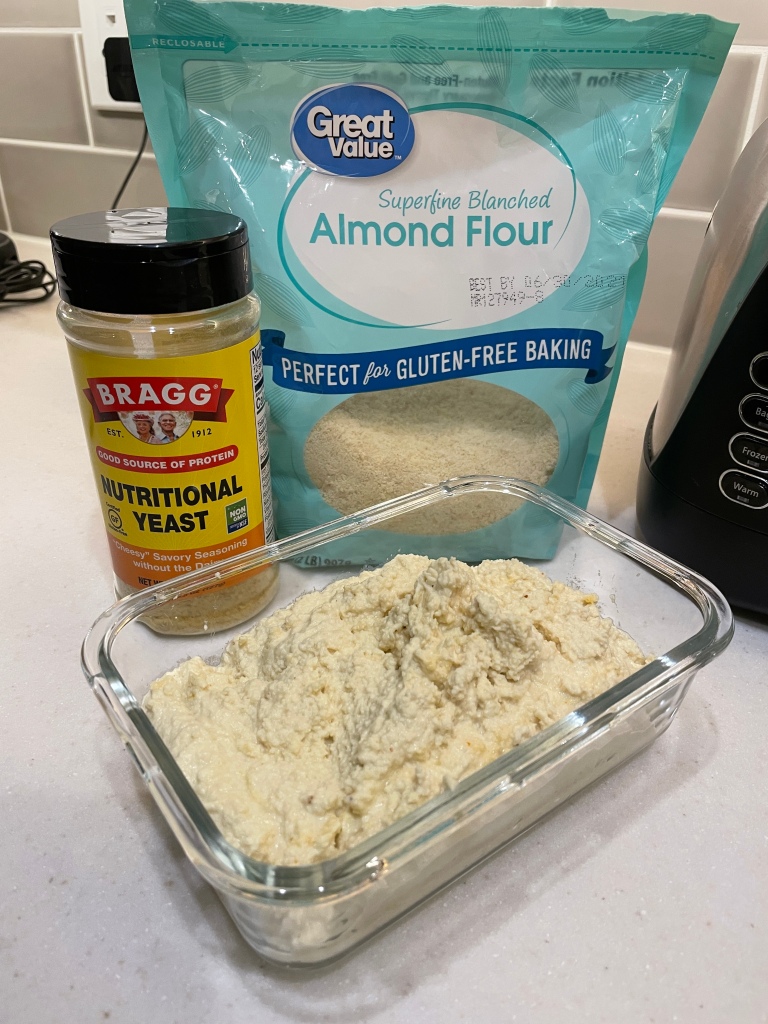
This is super easy to make and tastes like the real deal. I will slather this on toast, pizza, pasta of any kind, as dip for veggies, and have even eaten this by the spoonful. I hope you get a chance to try this if you’re also allergic to dairy and are craving lasagna.
Ingredients:
2 cups – almond flour
3/4 – 1 cup — water
1 — Tbsp. Nutritional Yeast
1/2 tsp. Garlic powder
2 Tbsp. — Lemon juice
Directions:
Whirl this around in a high speed blender until it looks like ricotta cheese. You’ll need to stop the blender and scrape down the sides with a rubber spatula a few times to get it all incorporated. Then, transfer this yumminess to a storage container. Use anywhere you want cheese!
Now… if I could just figure out how to make cottage cheese? 😏🫤🤔 Could someone get on that?
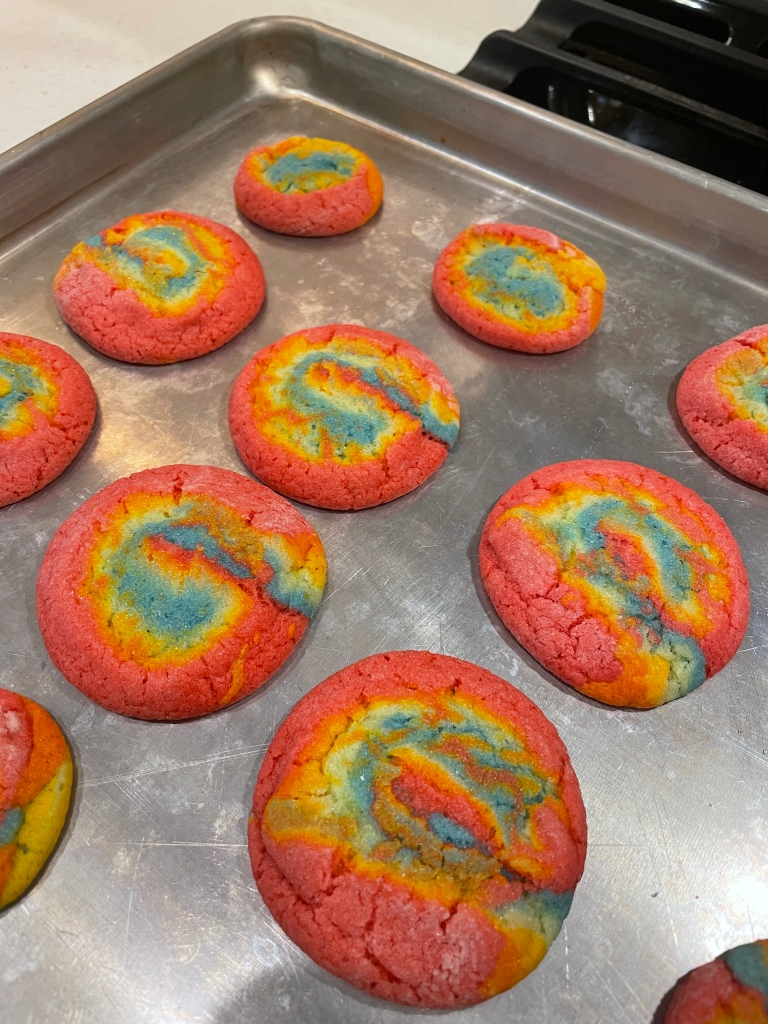
Watch me make cookies for PRIDE MONTH on Youtube! Yes, my channel is for crafting, but these cookies were like crafting!
This recipe comes from the Pillsbury site and although it’s not the easiest cookie recipe I’ve ever made, they do come out super cute, so it’s worth it!
I don’t make or crave sweets very often, but a few weeks back my husband and I went to Bob Evans to eat and he ordered their Peanut Butter Chocolate Pie. I was so jealous and I couldn’t stop thinking about it. I then craved it. So, I caved and found a vegan version I liked and wanted to make. It. was. FAB! We ate it for four days after dinner and although it was the most delicious thing I’ve eaten in a long time, I’m glad it’s gone now. I won’t be making this for a long time, but man, oh, man… I am in LOVE! FINALLY! I get to eat DESSERT!
Ingredients for the crust:
25 Oreos or Gluten-free chocolate cookies with an icing center
1/4 cup melted vegan butter
Ingredients for the Filling:
1 cup -Peanut butter
3/4 cup – powdered sugar
1/4 cup – coconut milk (from a can – after it’s been refrigerated overnight. Just the white coconut, not the liquid at the bottom.)
Press into a greased pie pan and then place in the freezer for four hours or for overnight
Next, make your filling by adding the peanut butter, sugar, coconut milk, and cream, flax seeds, and vanilla. Mix well with a hand mixer. Then, mix in your coconut whipped cream from the tub.
Remove pie crust from the freezer and add the filling
Melt 2 Tbsp. dairy-free chocolate chips
Melt 2 Tbsp. peanut butter
Drizzle over top of the filling
Chop dairy-free peanut butter cups and decorate the top
Place back in freezer for four hours or overnight.
This recipe is easy to make and is a great way to get your veggies and your protein. Simply serve over rice and you have a tasty, simple dinner. It’s delicious and reheats really well. We ate it again today and it was still as tasty as the first day.
Ingredients:
2 Tbsp. – Oil for frying
1 small – Onion, or onion powder
1 small head – cabbage, sliced
1 – Celery sliced, or celery salt to taste
1 – Carrot, peeled and julienned
1 Cup – Mushrooms
1 – Red Bell pepper, sliced
1 Cup – Whole cashews
1/4 Cup – White wine
1/4 Cup – Soy Sauce or Tamari of gluten-free
Splash – Sesame Oil
Generous Sprinkle – Garlic Power
Black Pepper to taste
Directions:
Wash, prep, and cut up all vegetables
Add oil to skillet and heat
Add onion, celery, and carrots and fry for five minutes
Then, add mushrooms, pepper, and cashews
Fry for another five minutes
Add wine, soy sauce, and cabbage
Stir well, cover with a lid, and steam until cabbage is tender
Stir in sesame oil, garlic, and black pepper and serve over rice